I know it’s only November but I couldn’t wait to share the first post in my Christmas cake decorating series – Festive Bakes (Plus Christmas decorations are now all up in the shops which has got me all inspired!)
I’ve been wanting to try making some slice and bake cookies for ages and thought some sugar cookie dough dyed a very festive red and green would be a great place to start.
These vanilla cookies are my go to recipe for my cut out cookies. I love making cookies and cookie pops (I seem to have made quite a variety of different ones recently!)
For the cookie dough you will need:
275g plain flour
1 tsp baking powder100g caster sugar
75g butter, diced
1 large egg, beaten
2 tbsp golden syrup
1/2 tsp vanilla extract
Method
1. Preheat the oven to 170°C/325°F/Gas Mark 3
2. Place all the dry ingredients into a large mixing bowl and rub together with your fingertips until the mixture resembles fine breadcrumbs. Make a hollow in the centre and pour in the beaten egg, golden syrup and vanilla extract. mix together well until you have a ball of dough.
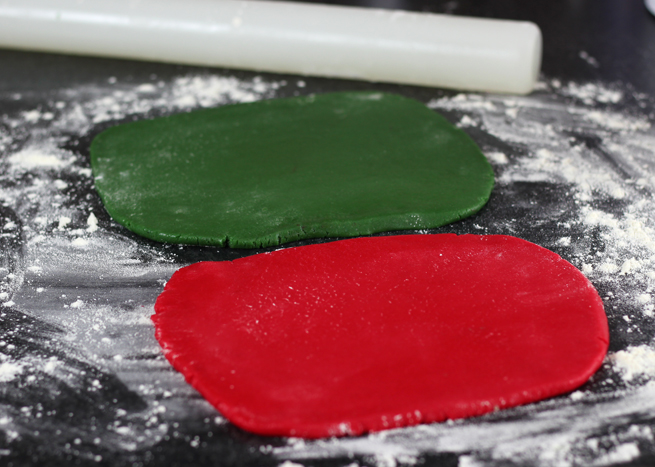
3. split the dough into 2 balls and add food colouring, I use gel food colouring. For these cookies I used red and green. Knead the dough with a bit of food colouring, add colour until you reach the desired shade for your cookies.
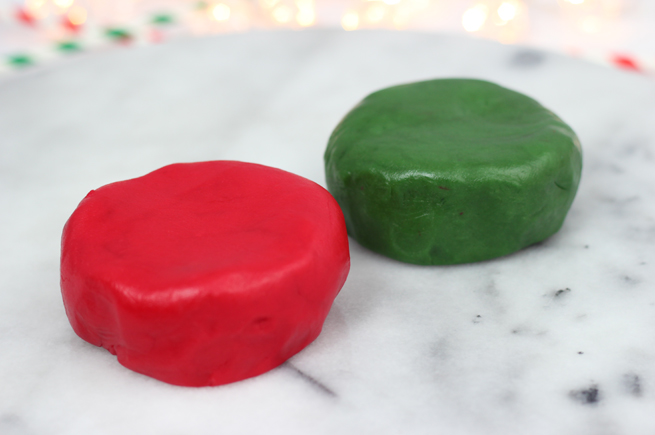
4. wrap the cookie dough in clingfilm and chill in the fridge for at least 30 minutes.
5.When it’s ready, roll the dough out on a floured work surface
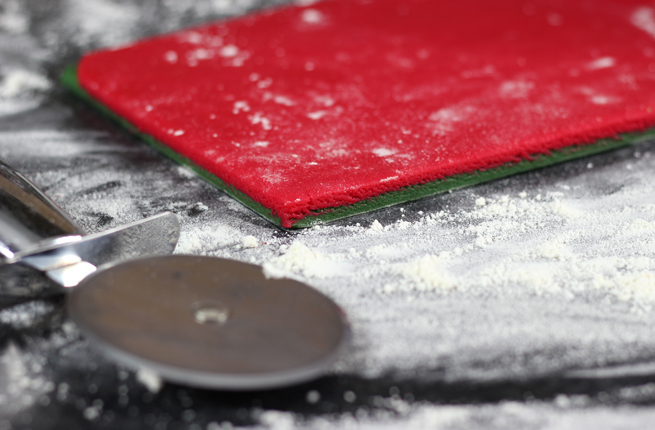
6.You then want to brush a little water on the surface of one of the rolled out doughs then lay the other one on top. I neatened up the edges with a pizza cutter.
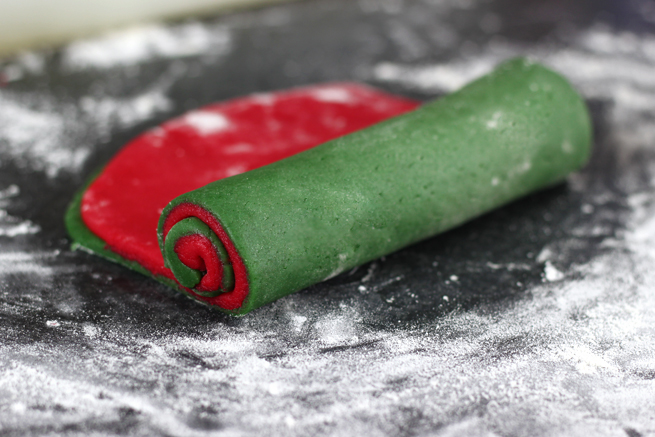
7. Roll the dough into a log, as you would a swiss roll.
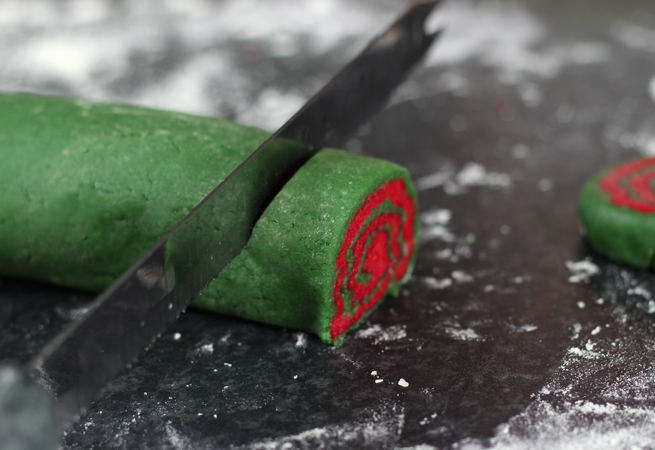
8. Slice the cookies, you want to slice them to about 1cm to 1 and a 1/2 cm thickness so you can flatten them out slightly.
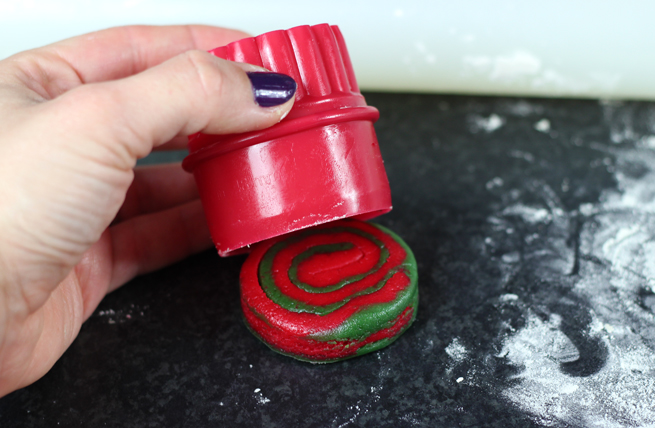
9. Use a cookie cutter to neaten up the edges of the cookies.
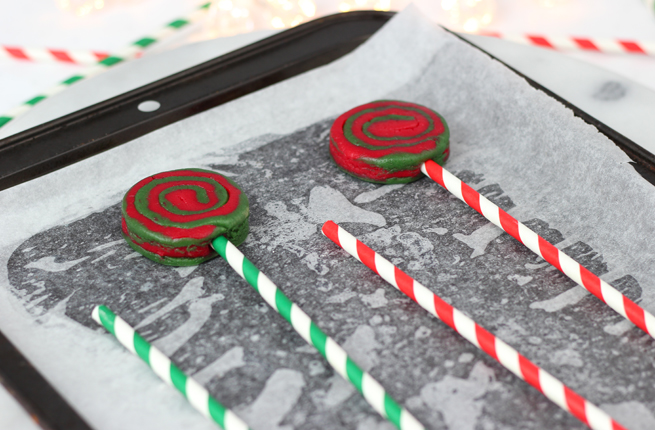
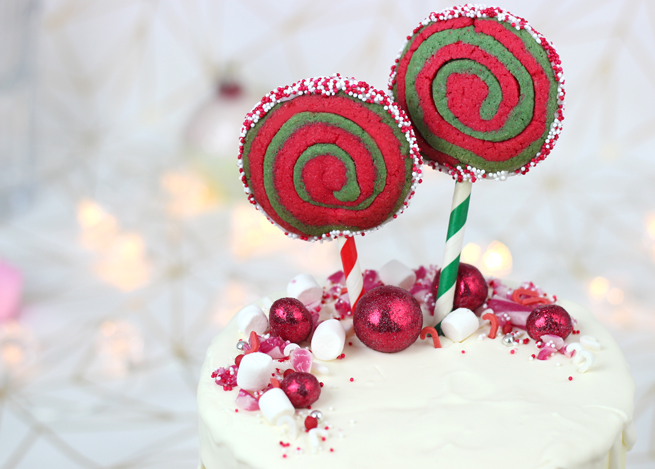
10. At this stage I used festive stripey paper straws to create cookie pop sticks. You can use regular cake pop sticks if you can’t find paper straws. I purchased these ones from Home Bargains, but you can find quite a few suppliers online like Yolli.

11. Place the cookie pops onto baking trays and place them in the oven to bake for about 12-15 minutes
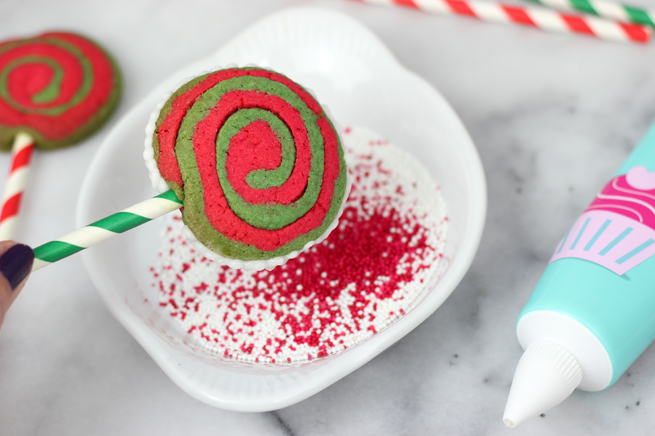
Once they are baked, remove from the oven and leave to cool on the baking sheet. I decorated the edges of the cookies with decorative icing and dipped in sprinkles.
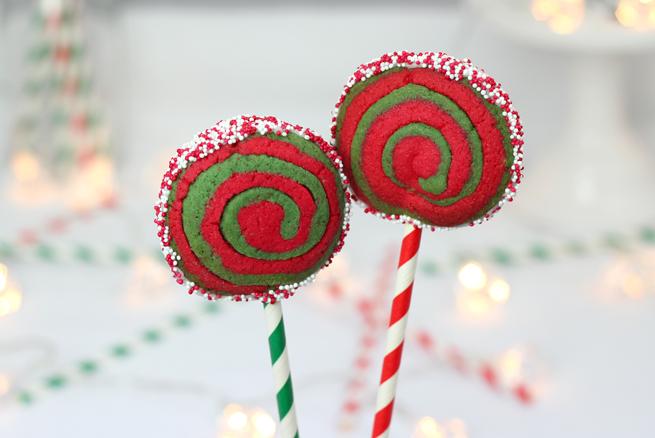
They look really effective and you could experiment with different colours of cookie dough. I think I should have chilled the dough again after rolling into a log as I think the spiral shape would have held up a little better and turned out a bit neater. But I’m quite pleased with how they turned out.
I used these to decorated a cake covered in buttercream and used white candy melts mixed with a little double cream to create a drizzle. That’s another cake decorating experiment I tried out as I’ve been following bakers on Instagram, such as Katherine Sabbath and Reshmi Bennett who owns a bakery in London – Anges de Sucre. I took inspiration from their designs using sweets to decorate the top of the cake. I used broken up candy canes, red & white sprinkles, candy cane sprinkles, mini marshmallows and sugar spheres rolled in red edible glitter.

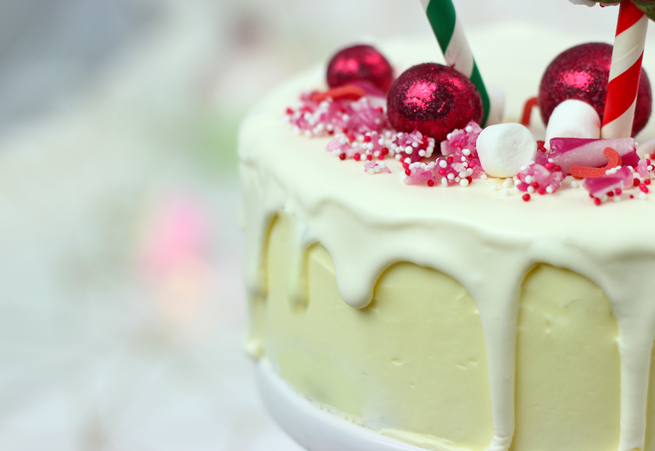
It was fun to create and experiment decorating a cake using different techniques, I’m always developing my skills in cake decorating and love sharing my results.
I’m already working on my designs and ideas for my next baking tutorial! I hope you enjoy this post and look forward to sharing more Chrismas baking ideas to inspire your festive bakes :o)
Happy baking!